For the first earthen structure we’re building here in Costa Rica I wanted to pay homage to the indigenous people (like the Bribris of the Talamanca Province and many other tribes), who traditionally built thatched conical structures framed with poles that symbolically represented the legendary/archetypal primordial hill where creation began, and the universe itself. Photo below from:
http://www.oxy.edu/biology/tropical-ecology-2014/june-3-2014-ditsowu-talamanca-costa-rica
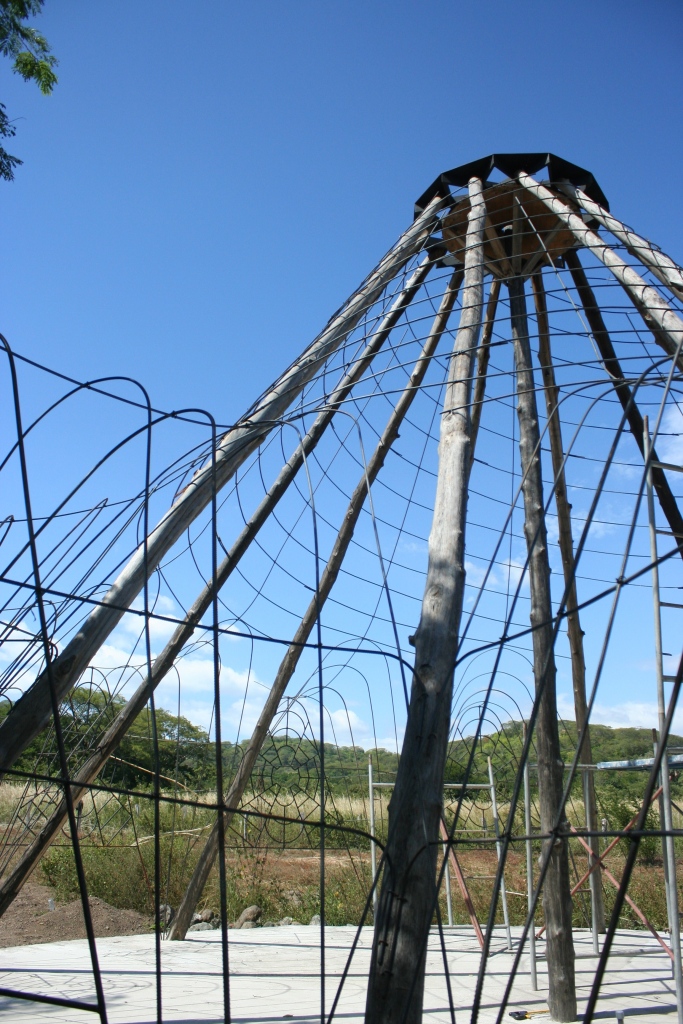
As shown in my previous blog entry: “Casting the foundation“, I decided to use a similar conical pole structure as a starting point before jazzing it up a bit. This is how our first Costa Rican soon-to-be earthen structure looked while the concrete was setting–like a 20 foot/6m high conical pyramidal capstone. 
To build the skeleton, I had originally used bamboo for the verticals and “bejuco” (the flexible parasitic vines that climb and hang from trees) for the horizontals, and had intended to use some fish-netting for the mesh. Although the purist side of me really wanted to stick with natural materials as the natives did, the termites and other wood-boring insects like carpenter bees proved to be a really big problem and I didn’t want to use anything super toxic but hadn’t yet found a good enough natural solution. After noticing just how infested the bamboo and the “bejuco” were with termites, I was concerned that they would eventually spread to the teak poles. Plus, due to their irregular nature, it was much harder to control the contours of the “web”. So, in the end, I decided to tear it all down and replace it with rebar (which was way easier to work with), just as I did when I built my mud hut in California, I don’t expect to use this technique on all my future earthen buildings, and would prefer to avoid the use and expense of metal reinforcement/formwork, but it seemed to make sense for this one. Here’s what it looked like before we tore it off:
For security reasons, I designed some decorative security bars, made a full-scale cardboard template, and welded the first one which local welder Paul Bazan finished before cranking out another ten of them, along with a matching security door.
Not saying using metal is at all necessary to build a curvy mud house, but by incorporating a relatively inexpensive recycled contemporary material like thin-gauged rebar (a stronger, fire and insect-proof substitute for reeds/saplings/vines), I can easily create free-form livable sculptures that would not be possible with standard masonry procedures, with virtually all the benefits of using earth rather than concrete. This technique I’ve devised, a cross between traditional “wattle and daub” (one of the most ancient construction methods), and “ferrocement” (one of the most modern methods), has all the advantages of the former minus most of the disadvantages. Perhaps I should call it “wired and daubed capless ferro-cob”? Using earth instead of concrete makes it greener and cheaper than ferrocement with superior insulation and sculptural qualities.
Although it makes the structure slightly more expensive and a bit less green/sustainable, this modern version of wattle and daub facilitates defining the shape, smearing on the mud, makes it stronger (even with thinner walls), more durable (fireproof), and even quicker to build than conventional wattle and daub, which has always been the quickest way to build with earth. Plus, it’s more theft and earthquake resistant, and easier to get approval for building permits since it can accurately be described as a wooden and metal structure plastered with mud-straw. Most importantly, it can prevent a roofless earthen structure from collapsing if ever too much water were to penetrate the hard lime (artificial limestone) shell due to a large crack, for instance.
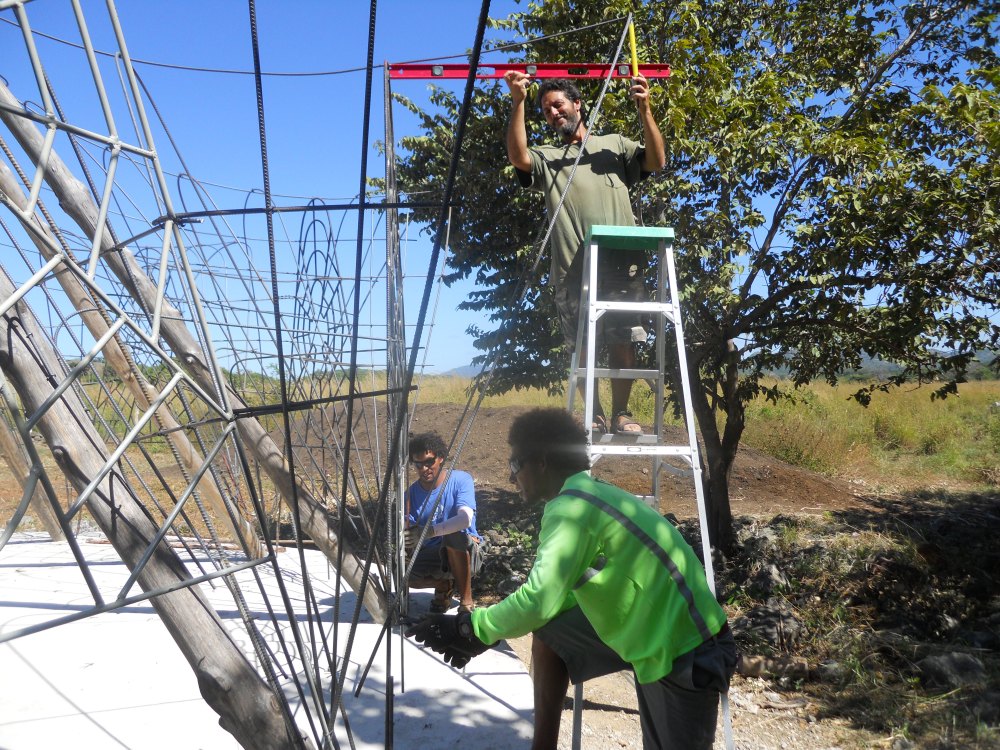
Anyway, after putting in so much hard work to build the foundation I didn’t want to waste any interior space. For this reason, to counteract the inward leaning walls that cut off a lot of standing room, I decided to open it all up like petals of a flower with earthen vaults that also served to minimize direct sunlight from entering and overheating the building while allowing plentiful cross-ventilation . To do this, my crew and I started by anchoring the arched security bars into the concrete slab (using a drill and epoxy since they weren’t yet fabricated when the slab was cast), and stabilized them in a vertical position with rebar supports nailed to the teak posts.
We then proceeded to weave the rest of the steel “web” around them to serve as a steel “skeleton”, a built-in formwork to later facilitate the rapid application of a mud-straw “skin”, while making the structure even more earthquake resistant.
I used a level in conjunction with a tape measure to ensure that all the vaults ended up with the same curve as Carlos and Olman wired them into place.
This is how Olman (left) and his brother Carlos (right) consistently replicated all the curves used to create the individual arches in each vault:
To facilitate the creation of a double spiral of bottles in the upper part of the cone and to avoid having to cut any rebar later on, we framed the (#3) rebar in a spiral pattern that rose 30-cm/1 foot between the centers of each post.
As it looked inside once the spirals were almost finished:
As it looked outside once the spirals were almost finished:
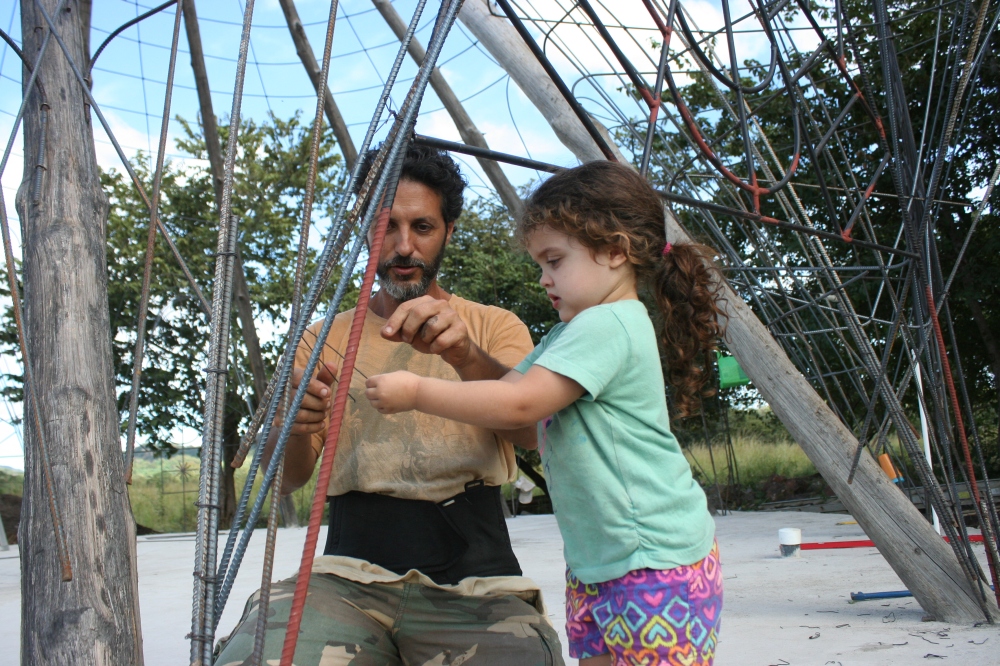
A photo of my daughter, Zarapheena, teaching me how to tie the rebar:
The spider web-like security bars were designed to loosely mimic the arches/vaults and the 12 wooden posts radiating from a hole in the apex, as well as complement the 12-pointed star on top.
The rebar “web” also conveniently served as built-in scaffolding for my spider-like helpers:
Turns out that my family won’t be the first residents of this house since some yellow breasted Great Kiskadees have built a nest and raised a family under the umbrella-like plywood at the apex. It’s been there for months and is still there…
Exterior view of rebar web, minus the grand entryway, plus a horse. You can finally see what the concrete slab looks like without the wooden formwork.
Once we were done with the rebar, we began covering the frame with 1″ mesh to prevent the soon-to-be-applied wet clay-straw from falling through the spaces in the rebar skeleton.
Later on, after the 30-cm/1-foot thick thick outer mud-straw shell was complete, the mesh and rebar was plastered with a thin layer of mud-straw to hide it on the inside but you’ll have to wait for the next blog entry to see photos of that…
 From the exterior, it resembled an invisible house that sparkled in the sunlight.
It looked so elegant at this stage that I almost didn’t want to mud it up…
Looks like 12 rays of the sun peeking through the 12-pointed star holding the 12 posts:
Once all the metal work was done, we added a 3″ (7.6-cm) lip of concrete around the perimeter to cement it all into place and, more importantly, to keep the mud walls off the floor in case of any flooding inside from, say, a broken pipe or something.
We added rocks in the concrete lip to give the walls something extra to grab onto for extra seismic resistance and sealed it (along with the entire slab) with an acrylic sealer to prevent moisture from wicking up into the mud-straw walls.

The structure was now finally ready to be mudded…
To see this giant “web” covered with mud and straw, stay tuned, same spider time, same spider channel…


Looks great. I enjoy your logic. Nice family. God bless you and yours.
LikeLiked by 1 person