It’s been a while since my last architectural update about our Costa Rican mud home being limed so I have a lot of catching up to do. As they say, a builder’s work is never done. I will save my long detailed explanation of what’s been keeping me so busy for the next article. In the meantime, I would like to share an assortment of photos of the finishing touches being applied to the mud house (most of them taken over a year and a half ago), that I’ve been eagerly waiting to present.
For those unfamiliar with the term “cob”, it refers to a system of building with earth in a monolithic manner in damp climates using a “cap & boots” approach. In other words, an overhanging roof (like a cap) to protect it from rainfall, and a foundation (like boots) to protect it from the wet ground. Many types of earthen buildings such as wattle and daub, adobe, rammed earth, light straw-clay, superadobe/earthbags, earthships, earth-mortared cordwood, earth-plastered strawbales, etc. (and non-earthen structures as well) have been built using this simple principle. Just as at least half of our society’s laws are stupid and should be disregarded, I decided to break with this traditional strategy and willfully violate one of these two basic “rules” for the numerous reasons outlined in my earlier article “Mudding the Wired Web” and construct an experimental “cap-less cob” casa–gotta show off those sexy curves!
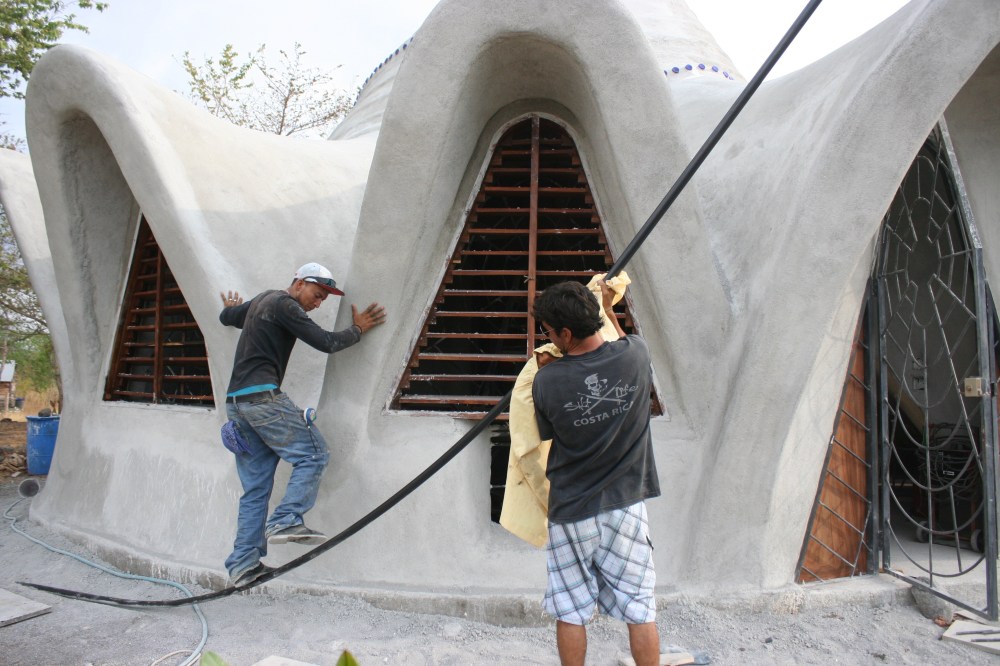
Essentially, in lieu of an overhanging roof, the idea was to cover our modern wattle & daub style earthen home (with a high straw content for more insulation and less thermal mass) with a lime/cement/sand plaster applied over a 1” metal mesh. The breathable (vapor permeable) plaster creates a hard, almost one-inch-thick stone-like shell over the thick mud-straw walls, protecting them while imparting a nicer texture. To prevent the lime and, more importantly, the mud-straw underneath from absorbing any rainwater, we coated it (inside & out) with a breathable and stretchy elastomeric latex paint to bridge any hairline cracks and avoid trapping any moisture inside the walls. I’ll explain more about this technique I devised in the next installment.
Anyway, though I have decent woodworking skills, I ended up hiring a local carpenter named “Chino” to help with the louvers, doors, and cabinets using wood milled from one of our fallen Guanacaste trees. Here are a few photos of his work in progress:


")
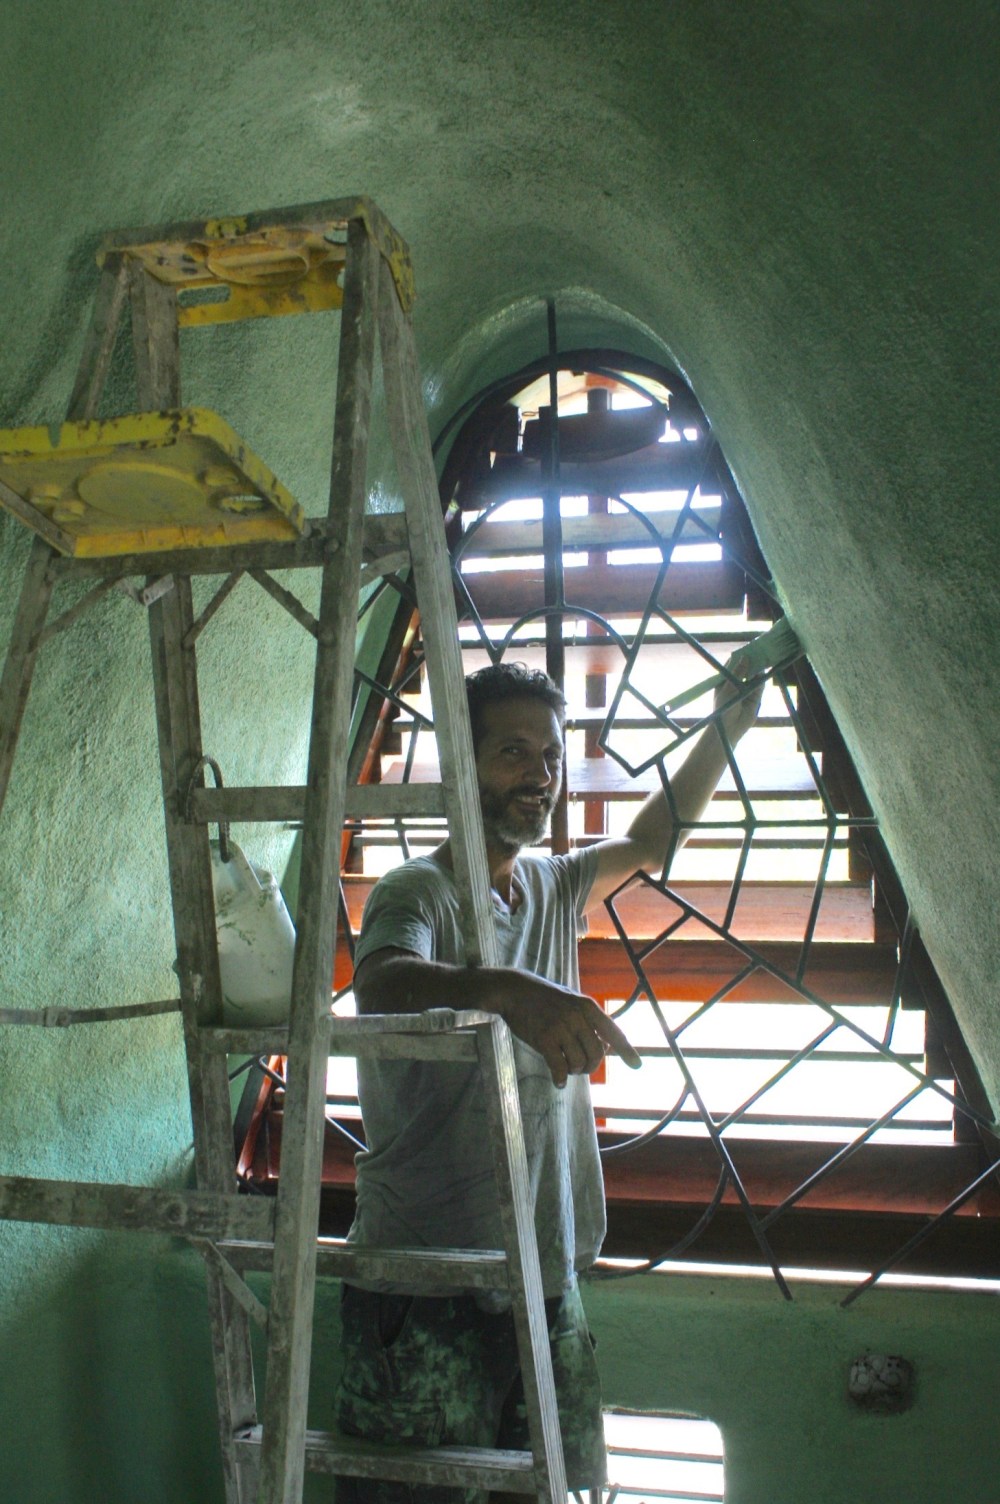
Though I have decent welding skills, building a spiral staircase is a fairly complicated project so I hired master metal worker Paul Bazan (Tamarindo Welding), the same local artisan who earlier fabricated the decorative metal security door and window bars. After preparing all the components, the flat steel bars were bent and fastened into equidistant rings around the central post, giving it the appearance of a spinal cord. This is a great action shot of Paul screwing in the waistbelt-looking rings while one of his assistants welds one shut around the post.

Once the circular supports were screwed into place and welded, the triangular frames for each step were welded onto them and later reinforced with more metal.

Check out how Paul and his helper bent the steel pipe for the spiral railing:
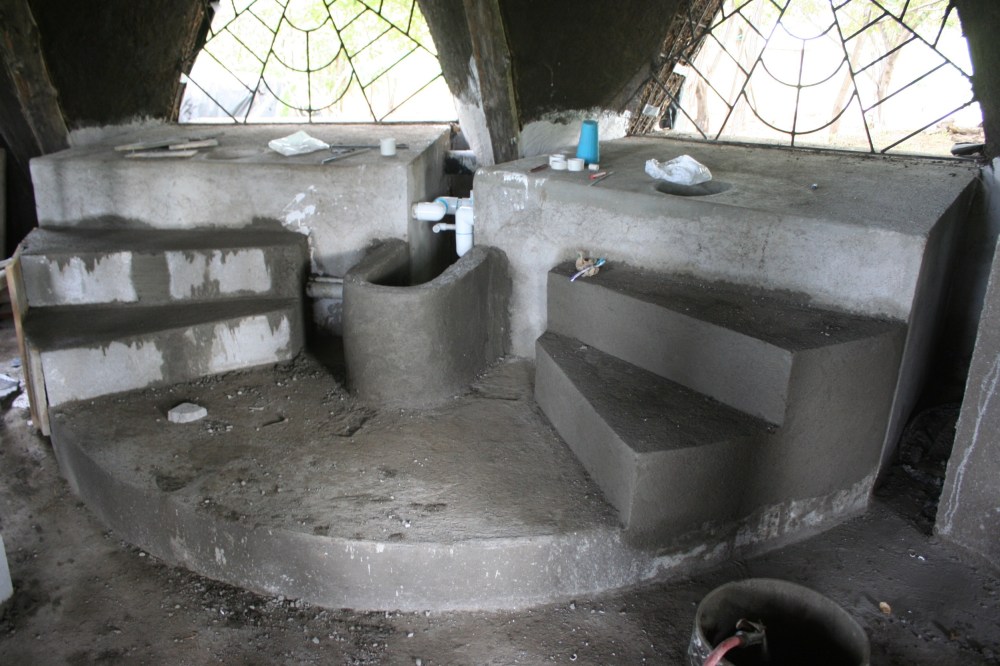
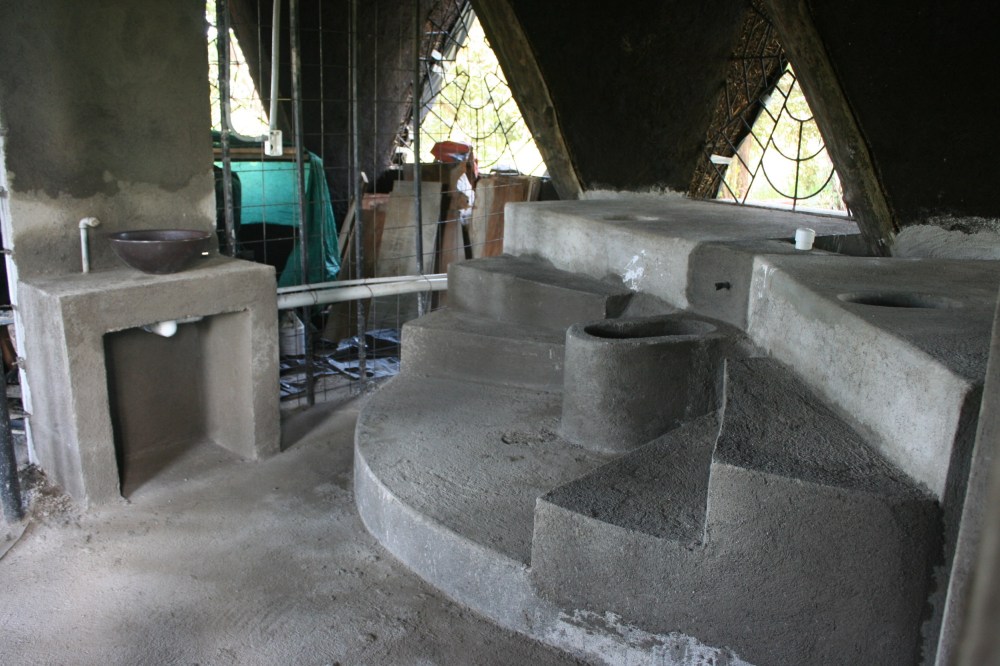
The next photo is of the twin compost toilets with a bidet in the center, before being tiled:
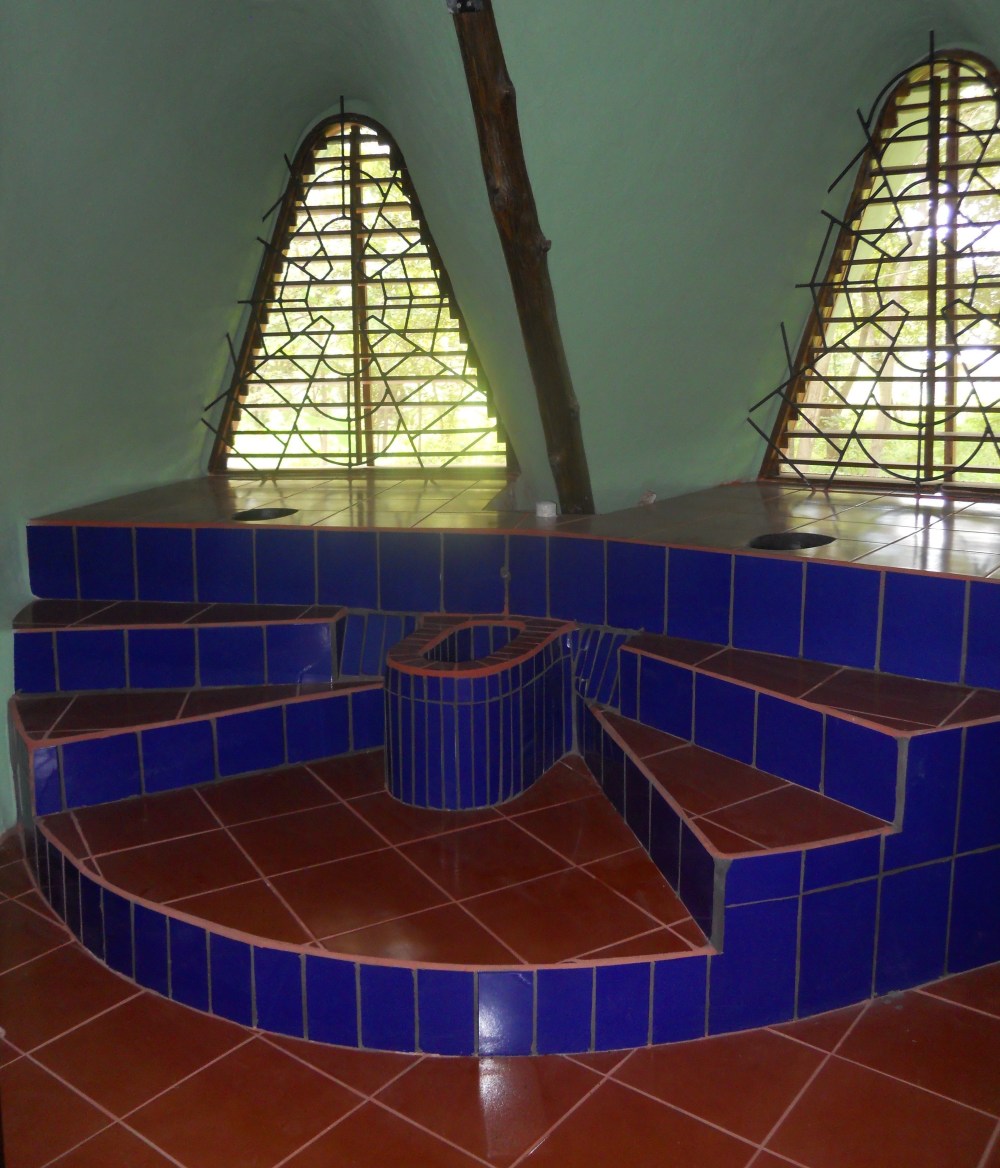
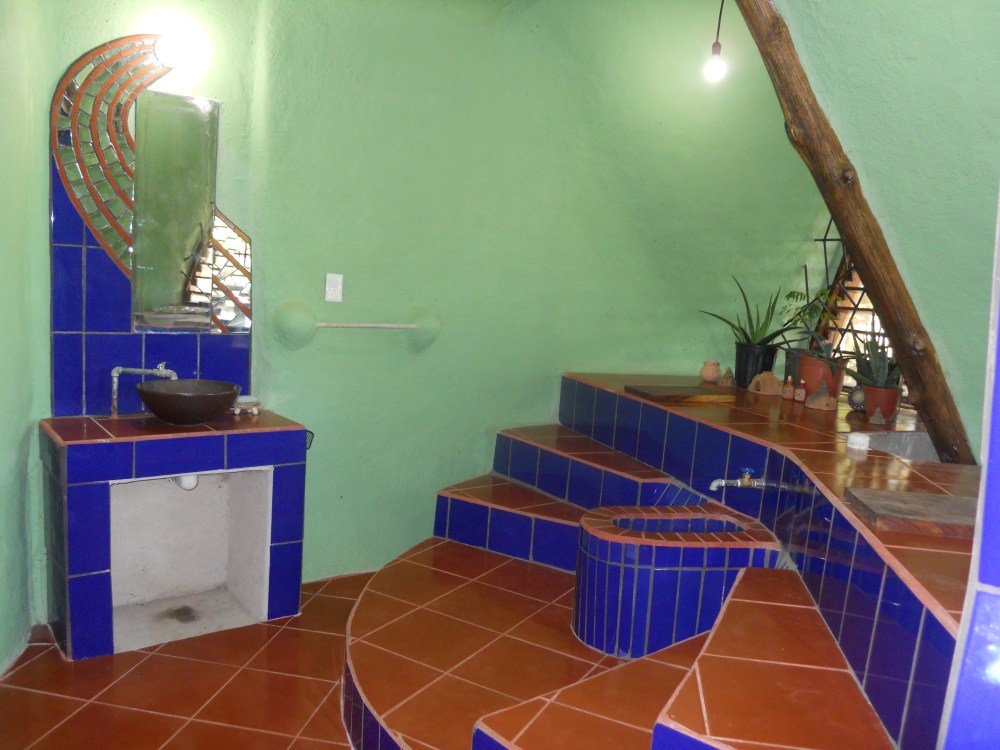
Like royal thrones on a pedestal, here are the compost toilets (lids not yet attached) and bidet after being tiled:
Just to recap for those unfamiliar with the concept, the basic idea is that instead of daily committing the environmental crime of flushing away our urine and feces with potable water and creating a huge blackwater problem, we alchemically transmute it into rich and valuable fertilizer. Each bowel movement is covered with sawdust and there is a vent pipe to avoid any odors. When the first cinderblock chamber becomes full after about a year’s worth of use, it will be sealed and the second toilet will be used instead. As another year passes, the fecal matter (along with the toilet paper) in the first toilet will break down and be converted into compost. By the time the second toilet chamber is full, the now-composted contents of the first one will be emptied from the door on the outside of the house into a wheelbarrow and used as fertilizer. This sleek, do-it-yourself, easy to clean, durable, and low-tech “fertilizer-making machine” eliminates the need for an expensive septic tank, is not dependent on water and saves tons of it that would otherwise be wasted (especially problematic here during the dry season), is compatible with squatting (a superior posture for elimination), is much more sanitary than the normal practice here of throwing used toilet paper in the wastebasket, eliminates plumbing problems, prevents toilet water from overflowing and contaminating the house with raw sewage every time there is a blockage, and won’t vaporize fecal matter all over the house like normal toilets do every time they are flushed.
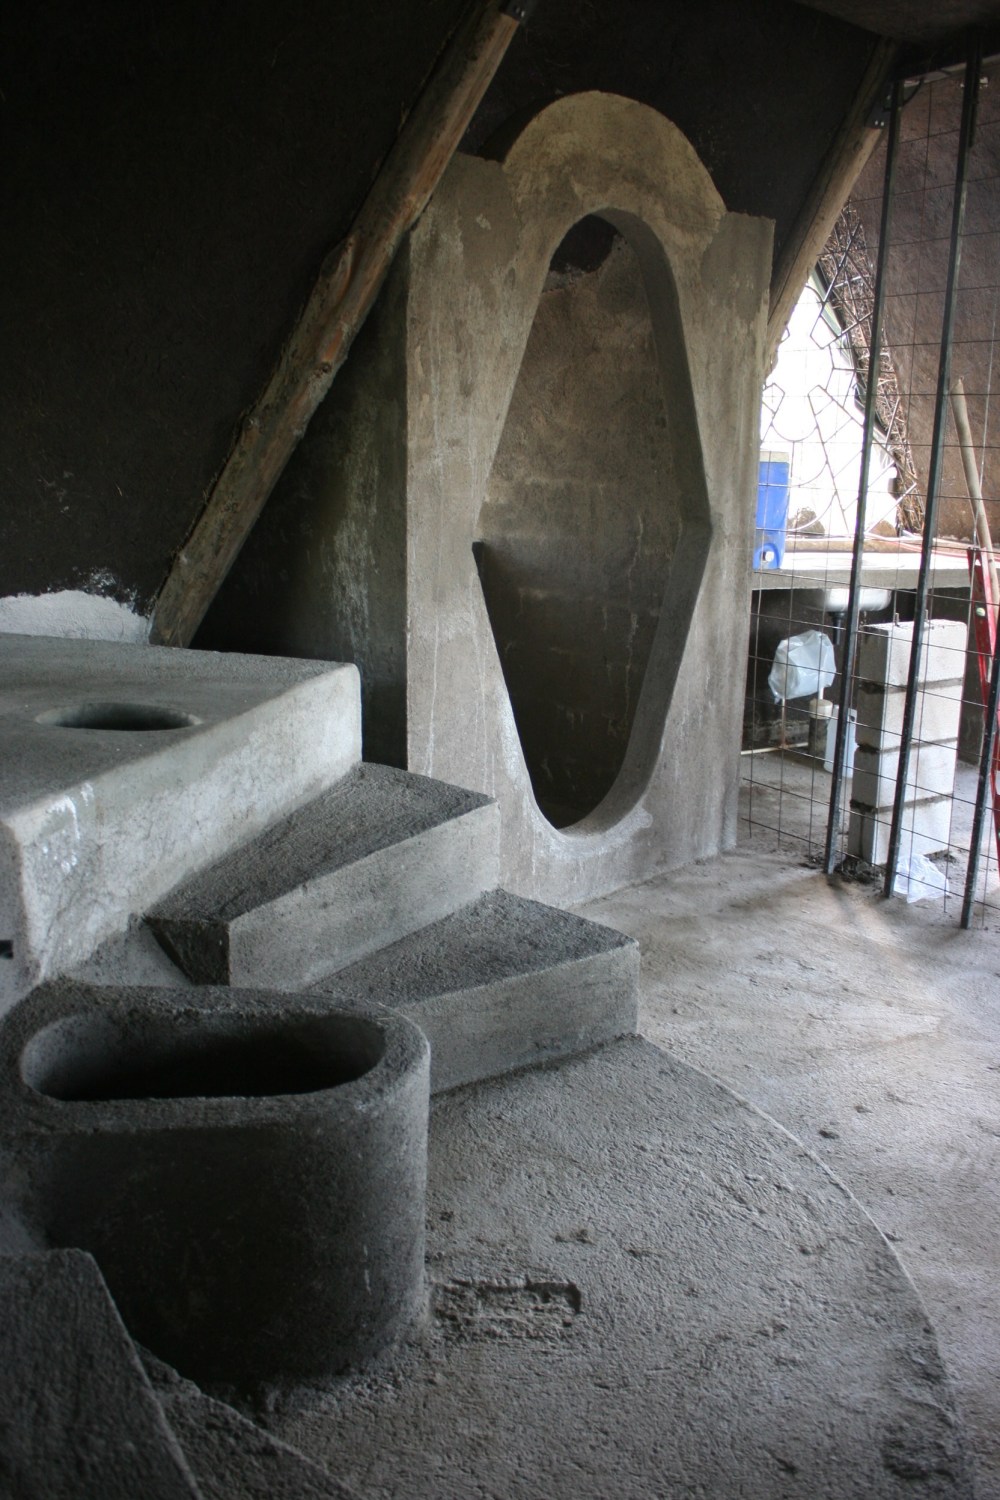
This next photo shows the shower enclosure mimicking the curve of the windows, before the tile work:
Now, the shower enclosure after the tile work:

One last view of the toilets and sink before the tiling:
Eventually we will place a better assortment of aromatic potted plants (like indoor jasmine) on top of the toilets that will vine up the security bars to create a pleasant atmosphere and natural fragrance, but here’s what it looks like now:
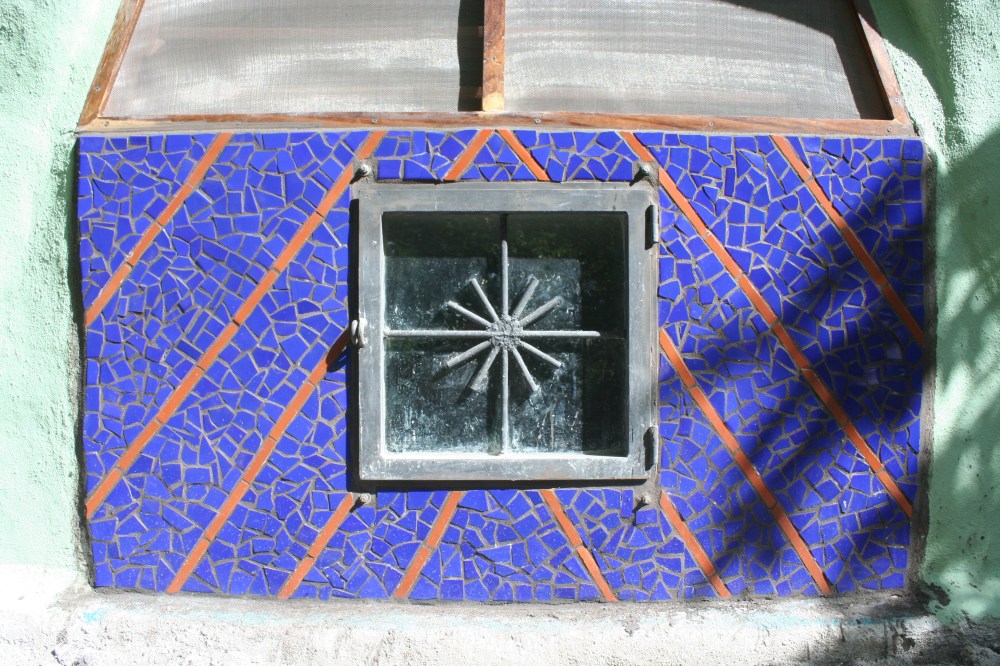
All compost toilets occasionally need to have their contents removed. With most commercial models, the excrement must be removed long before it has been converted into compost because they fill up way before they’ve had adequate time to break down. Usually one has to periodically carry a tray or bucket full of raw fecal matter through one’s house to bring it outside to a secondary pile where it takes about year to fully break down. By building the toilets into place, I was able to make a couple of huge reservoirs very economically using cinderblocks that should only need to be emptied about once a year–extremely low maintenance. Other than the doors and lids for the seats, there are no moving parts to break and instead of the flimsy plastic or fiberglass bodies the overpriced store-bought versions are typically manufactured with, mine’s got solid 4″ thick concrete walls lined with pool cement and coated with “water glass” (sodium silicate) to make them more water repellent and harden the surface making it more scrape-resistant come cleaning time. I designed them with small metal-framed glass doors (“truth windows”) in the back, accessible from outside, to remove the contents after they’ve had a year to compost thus avoiding having to handle and carry any stinky and pathogenic raw sewage through the house. Here is a picture of one being mosaicked by me and my wife with the enthusiastic help of our daughter:

Upon completion with black grout:
Painting the interior of this house was a bit tedious. Besides the rough texture that required brushing by hand, there are tons of details like the security bars, bottles, steel beams, wooden posts, etc. that formed quite an obstacle course needing special attention.
While I was busy cutting/shaping the irregularly shaped ceramic tiles and doing the grouting, Olman Guevarra was laying them in mortar. Here he is carefully and competently ceramic-coating the concrete kitchen countertop:

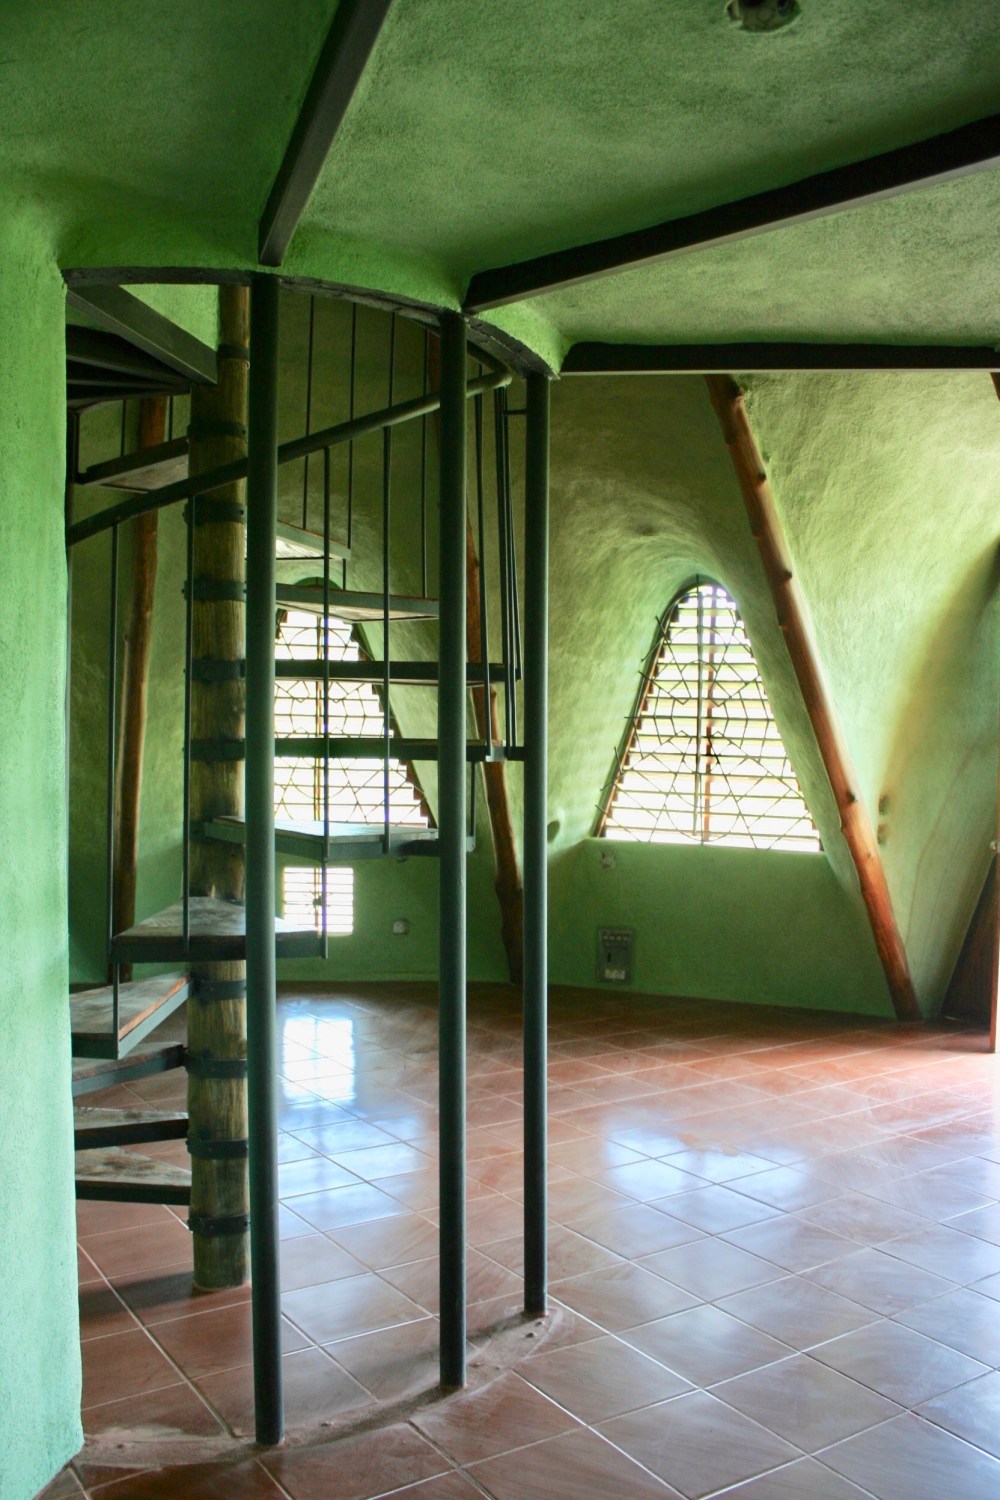
The next series of photos show what the house looked like after it was painted, the tiles all laid, the Guanacaste wood doors, desk, cabinets and shelves installed, the 12 wooden treads for the spiral stairs fitted into the metal frames, and given a heavy-duty cleaning:

One of my favorite photos:

I’ll probably never see it this clean again!


View from the loft:
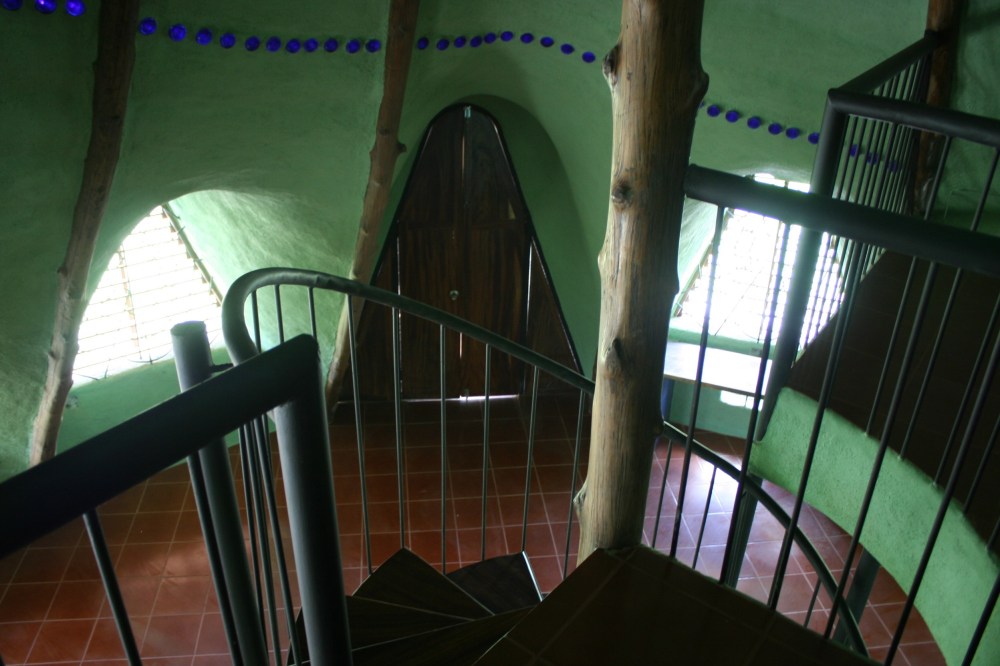
View from under the loft where our bed is located, the built-in desk on the right:

Notice the subtle blue glow emanating from the blue beer bottles matching the blue tiles used for the desk, kitchen, and bathroom. This may be my favorite shot of the interior:

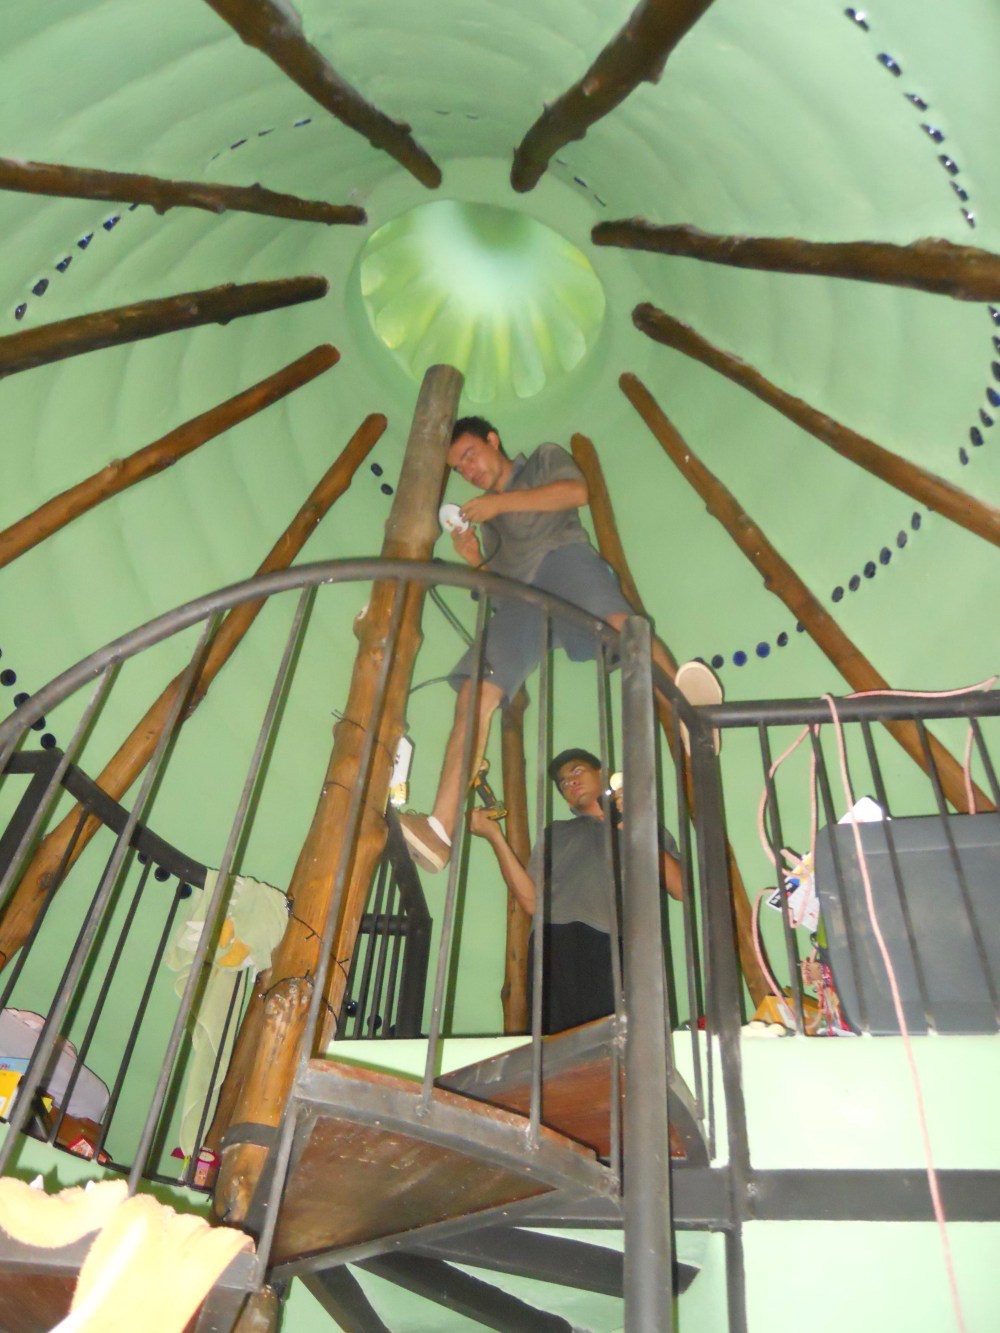
The house was recently wired up by a local electrician named Geiner Quiros Obando. Here he is installing a light fixture on top of the central teak post around which spiral the stairs:
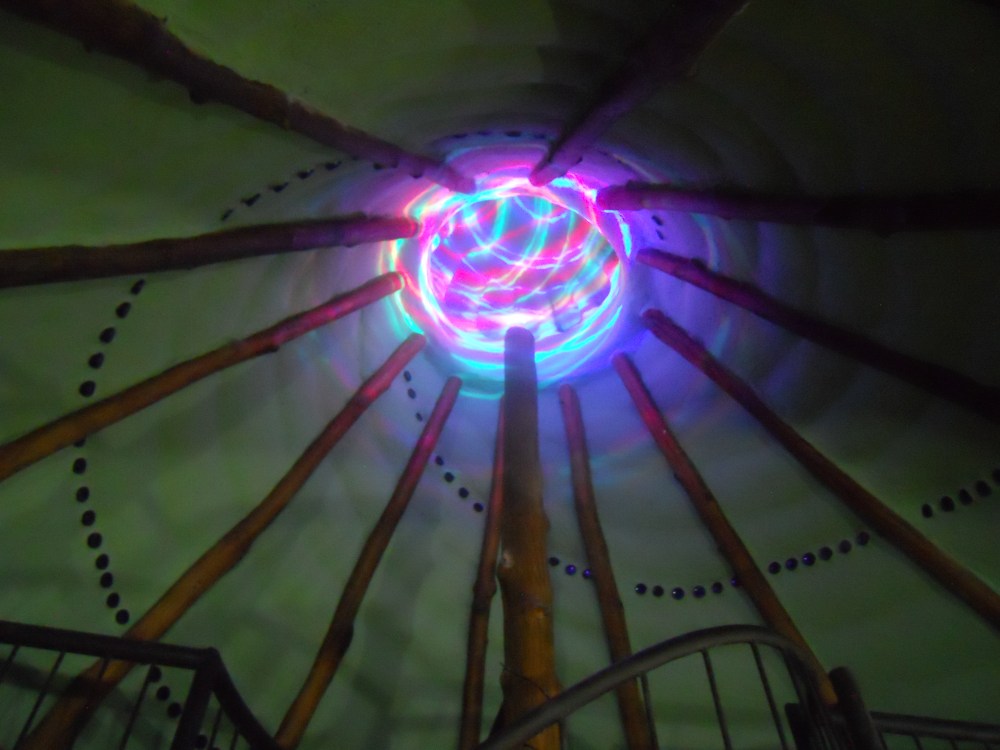
This next photo can’t adequately convey the visual effects created by the special spinning LED lightbulb mounted on top of the central post but this should give you an idea of the psychedelic mood lighting at the apex of the cone that spirally transports us through the portal into another dimension:
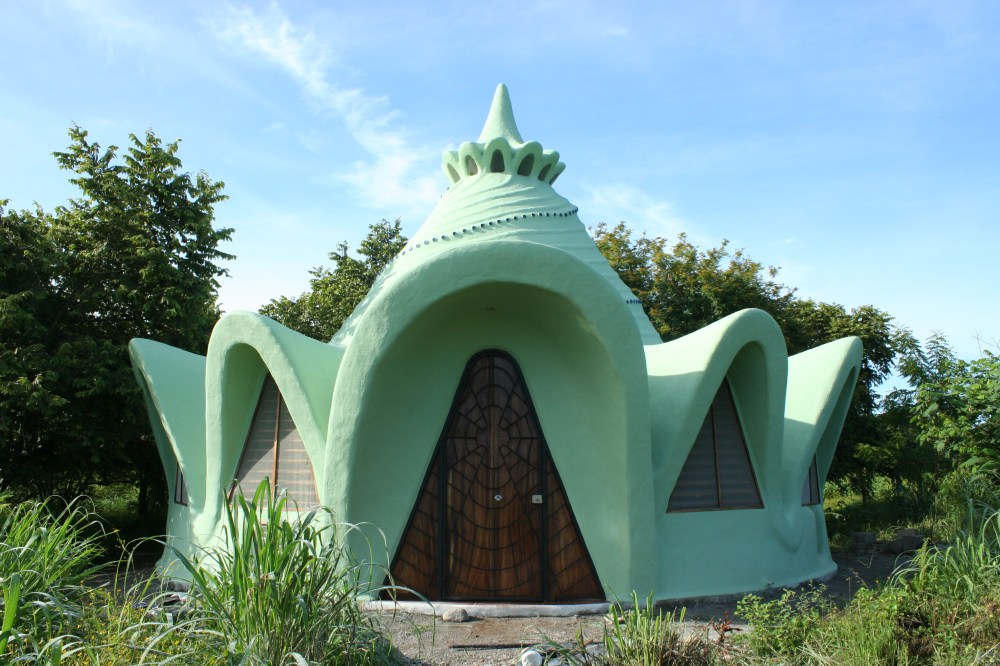
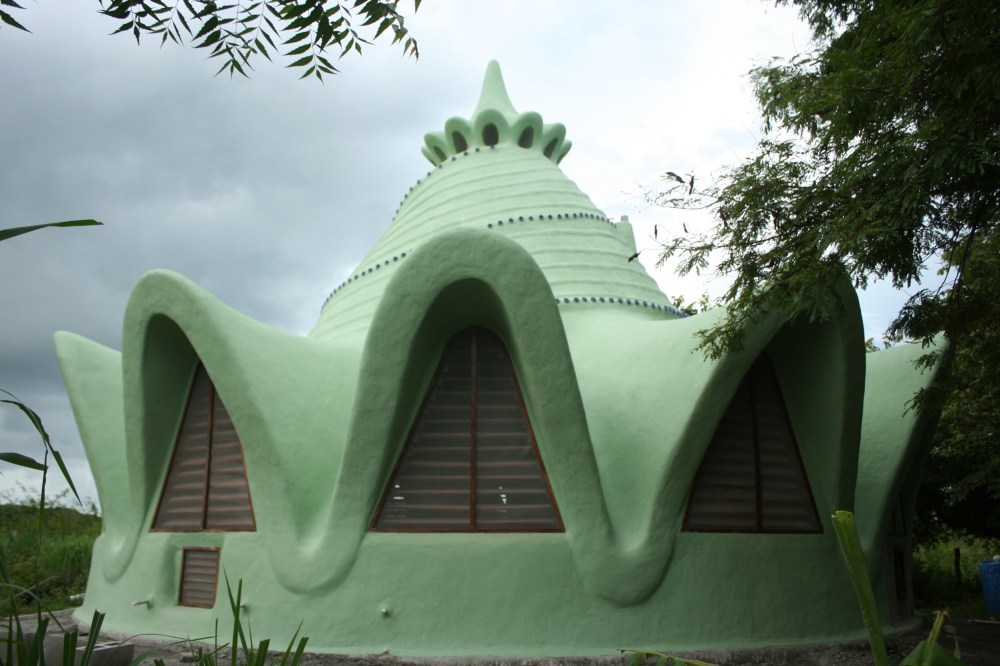
The last four photos are of the exterior of the house, beginning with the entrance:


Would have published these photos much sooner if not for the disaster we experienced shortly after taking them. More about this in the next episode so stay tuned in, same mud-time, same mud-channel…

This is incredibly beautiful and so unique. Just love it.
LikeLike
Very interesting
How much time and what is the cost of this house??
LikeLike
Thank you IWillem! Sorry for the delayed response, I’ve been in transition between Costa Rica and California. Though I kept a detailed list of everything I bought and all the hours that were spent to build it, I never got around to tabulating the total cost in labor and materials (maybe one day I’ll take on that project), but I can tell you it ended up costing me way more than it should have. It wasn’t my goal to build the cheapest earthen house I could, I just wanted to create a nice example. Looking back, I spent way more than necessary on the foundation (the most expensive component), and wasted way too many hours on repairing the house due to various mistakes and expensive lessons. Now that I’m wiser about the climate, the materials, and other things, I’m sure that the next house will cost a fraction of what I spent to build this one…
LikeLike